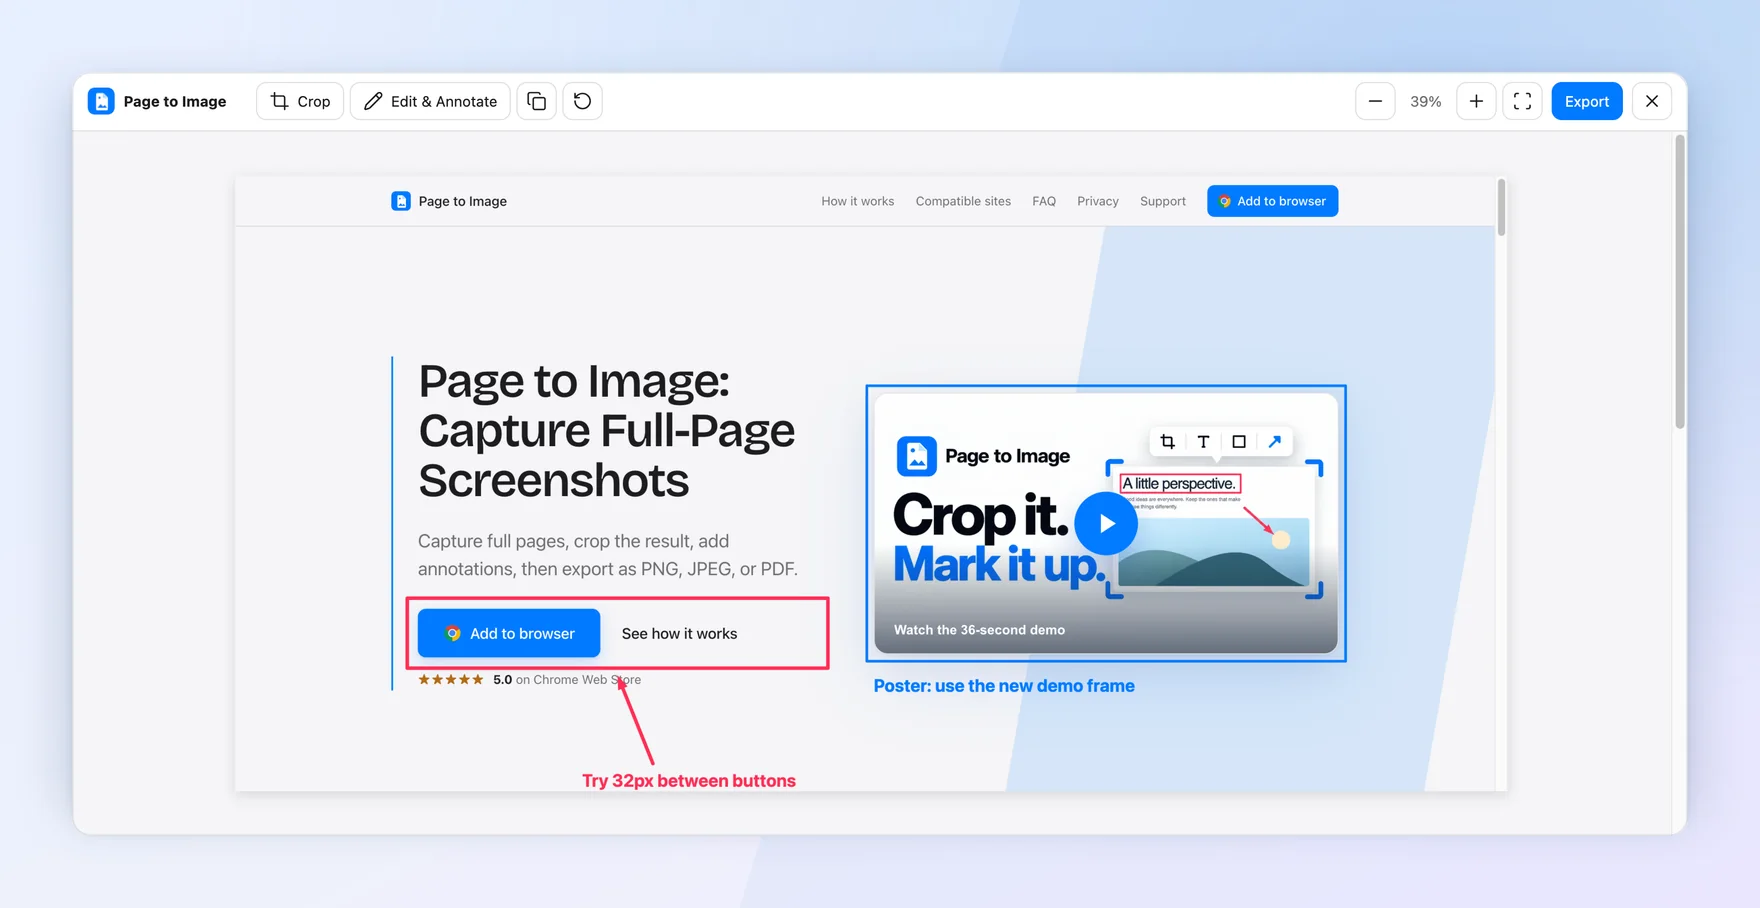
How to annotate a webpage screenshot with arrows and text
A screenshot with one clear arrow and a short note explains more than a paragraph of description. Here is how to capture a webpage and annotate it in the same place, without opening a separate image editor.
Capture the full page when position matters, the visible area for one screen, or a selected area for a component. Keep enough surrounding content in view so the person you send it to can find the spot on the live page.
Add marks that point to one thing each
In Capture review, choose Edit & Annotate. Use a rectangle or ellipse to outline the element, an arrow to connect a note to it, and the Text tool for a short label. Pick a color that contrasts with the page, and use a second color for a separate topic.
Crop to the story
Crop away unrelated parts of the page so the annotation is readable at the size it will be viewed, such as a chat message or a slide. Undo and redo are available while you work.
Share the file
Copy the image to paste it straight into a chat or issue, or export PNG for crisp interface details, JPEG for smaller files, or PDF for a document. Page to Image does not create share links; the file is yours to send wherever you discuss the work.
Design feedback on our own homepage: spacing and poster notes, ready to share.
Common questions
Can I edit the annotations later?
While Capture review is open, you can undo, redo, move, or erase marks. Your editing state is kept locally for 24 hours so you can come back to an unexported capture.
Which annotation tools are included?
Text, rectangles, ellipses, arrows, freehand drawing, blur, and erasers, with a choice of colors and stroke widths.
Can I annotate very long screenshots?
Yes, up to the browser’s editing limit. Larger captures open in export-only mode, where PNG and PDF export remain available.
Is Page to Image free?
Every installation includes 9 free captures with every feature. After that, annual access or a one-time lifetime purchase unlocks unlimited captures.